What a hero actually is
A hero is a free fifth unit that walks. You do not buy one with gold during a stage and you cannot sell it. You unlock it once, for stars, outside the stage, and then you deploy it on any level for free.
That framing matters more than it sounds. In most tower defense games, your towers are the plan: you place them, they fire, they win or lose. Kingdom Rush inverts part of that. Towers are fixed. A mage covers three tiles and stays there. A hero can be anywhere on the map at any moment, so your hero is the part of the defense that adapts mid-wave.
Every hero brings two active abilities plus a basic attack. Both abilities sit behind timers that refill during the stage, so the real question is never "can I use this" but "do I want to spend it here". A hero used well is worth a tower. A hero used badly is a fifth thing standing near your barracks doing nothing.
Read the ability icons before you read the lore. Most players lose their first dozen stages because they treat a hero as a stronger tower and park it next to the castle gate. It is not a tower. It is a mobile, damage-typed, timed resource.

Version check
The hero selection screen and the available characters differ across versions of Kingdom Rush. The portraits below are from this site's original game-art collection. Ironhide's current Steam listing describes 13 heroes, so do not transfer an unlock price or exact roster from another edition to the game you are playing. Check the in-game hero menu for the characters available in your build.
The nine heroes
Each hero below covers a different hole in your defense. Read the value, not the flavor. Two or three heroes will cover almost every stage in the base campaign, but the specialists solve specific, painful problems.
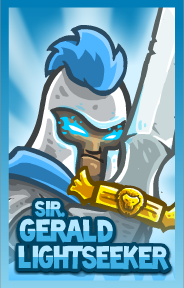
Sir Gerald — the balanced sword
Sir Gerald is the knight you meet first and the one most players keep forever. He swings a sword at whatever is nearest, and his abilities are straightforward: a rallying cry that strengthens the allies around him, and a charge that sends him into the thick of a pack to soak damage while your towers shoot into it.
He is not the strongest hero in the game. He is the most complete one. There is no stage type he is bad on, which makes him the correct choice whenever you are unsure. Put him on the first pack of a wave to absorb it, keep his rally near a barracks block so he buffs the fight you were already going to win, and you will never lose a stage because of your hero.
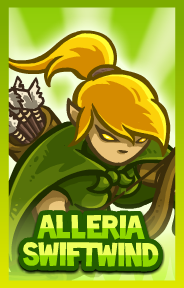
Alleria Swiftwind — the wildcat summoner
Alleria is a summons hero. Instead of one hero on screen you get a hero plus a pack of wildcats that charge down the path, hit hard, and pull aggro. Her abilities add more cats, change their target, or hand her a temporary burst of attack speed. The result is a wave of fast, fragile melee units that behaves more like a barracks squad than like a mage.
Her strength is that she survives being surrounded, because the cats absorb the hits instead of her. Her weakness is that cats only do melee damage, so on a stage built around magic-resistant enemies her summon pack is dead weight. Use Alleria on stages with heavy physical armor that a mage can strip, and where you want one button press to add a mobile block.
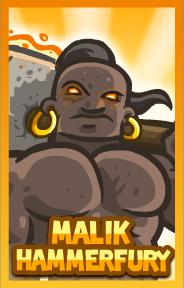
Malik Hammerfury — the blocker and stunner
Malik is a dwarf with a hammer, and his kit is built around control rather than damage. He can slam the ground to stun a group of enemies where they stand, and he can step into the path to physically block a wave the way barracks do. Both abilities exist to buy seconds.
Stun is the most valuable effect in the game. A stunned pack does not move, does not attack, and sits inside your artillery splash. Use Malik on any stage where you can see a long straight run for your artillery. Use him when runners or hounds would otherwise blow through a gap. He is a bad fit for long, winding maps where there is no single spot worth stopping a wave.
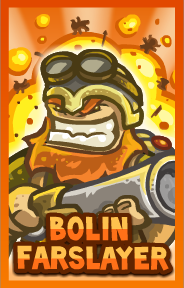
Bolin Farslayer — the archer hero
Bolin is the marksman answer. He fires single, precise shots at a range that puts him near your backline, and his abilities add burst range, faster shots, or a volley that hits a tight cluster. He is the one hero whose damage is close in type to your archer towers: physical.
Use Bolin when your problem is a wave that your magic towers handle slowly and your archers cannot keep pace with. He is also the hero you want on a stage where you have deliberately invested in the archer line, because he scales with that same physical output instead of fighting against your build. He contributes nothing against armor and nothing to the air, so pair him with a mage line, not instead of one.
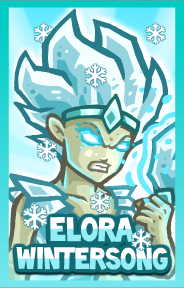
Elora Wintersong — the healer
Elora heals. That is the job, and it is a bigger job than it sounds. Her abilities send restorative energy along the path your enemies walk, so she can top up your heroes and your barracks troops across a stretch of map at once, and she can deliver a burst heal when a wave is on top of your line.
A healer earns her slot on long stages where attrition, not burst, is what kills you. Put her behind the chokepoint so her heals reach the block. She is wasted on short, aggressive stages where nothing survives long enough to be healed, and she is a poor fit for a boss fight that reaches your towers in the first few seconds.
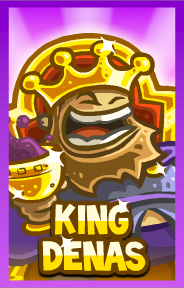
King Denas — the presence bonus
King Denas works differently from the rest. His value is not one big ability but a passive: standing near your own towers empowers the defense around him. His abilities reinforce that idea, extending his range of influence and strengthening the towers in his presence.
In practice he is the hero for stages where your towers are good but not quite good enough, and you want a flat bonus without changing your build. Keep him inside the tower cluster, not on the path. The moment he is standing alone in front of the line doing melee damage, he is wasting the one thing that makes him different.
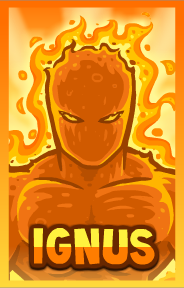
Ignus — the fire mage
Ignus is a ranged caster with a burn. His attacks set enemies alight, and his abilities take that further: a burst of fire that melts a cluster, and an upgraded effect that spreads burning damage between packed enemies. Magic damage, so armor is not his problem.
He is the hero for armored stages, and specifically for stages where the armor is in the front rank and the trash behind it is tightly packed. Burn damage that spreads rewards exactly that formation. He is useless against magic-resistant enemies and he has no answer for fliers, so his stages want a mage or artillery spine with him walking next to it.
Magnus Spellbane — the sorcerer
Magnus is the heaviest magic hitter of the nine. He attacks at range with sorcerous blasts and his abilities are pure burst: a devastating strike at a chosen point and a wider spell that hits everything nearby. Magic damage again.
Where Ignus wins gradually, Magnus wins in one press of the button. That makes him the hero for boss fights and for any wave where a single elite unit is walking toward you with a health pool your towers cannot chew through quickly. Save him for the wave that matters, and fire both abilities into the same target instead of spreading them across a crowd.
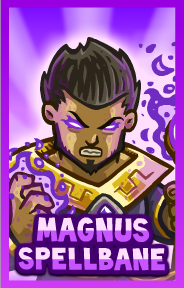
Ingvar Bearclaw — the viking
Ingvar is melee, aggressive, and built for sustained close work. He cuts through front ranks, and his abilities boost that: a frenzy that raises his own output and a heavy attack that punishes whatever he is standing next to. He is the hero for maps where you want something aggressive anchoring a barracks block.
Ingvar is at his best when his target choice lines up with your splash damage. Put him inside a packed group in front of artillery and his attacks and the shells do the same work twice. He is a poor answer to anything that outruns him or flies over him.
How hero XP and skill points work
Heroes level up during a stage. They gain experience by dealing damage and by killing things, and every level grants a skill point that permanently improves one of their skills for the rest of that run. A skill point spent in stage 4 is still spent in stage 15 of the same campaign. Points do not carry back to the menu.
This turns a hero into a long-term investment across an entire campaign rather than a one-stage decision. If you commit points to Sir Gerald early, he stays sharper for the rest of that playthrough. If you spread points thin across several heroes, none of them hit their strong tiers when you need them.
A few rules that catch new players out:
- Skill points are per-run. Restarting a campaign or replaying a level resets them.
- Points are permanent within the run. There is no respec, so put them where your campaign is going, not where one stage is going.
- Not every hero is worth leveling in every run. Two heroes at a real skill level beat nine heroes at baseline.
If your hero dies, it does not leave the stage. It returns after a timer. That timer is short enough that a hero death on a normal wave is an inconvenience, not a loss. It is long enough that a hero killed during a boss window genuinely costs you, so do not walk a low-health hero into the boss pack.
Practical rule
Level the hero you already bring everywhere. Do not spread skill points across your whole roster. A single specialist at full investment solves stages a half-trained generalist roster will lose.
Positioning: the rally point is where a hero pays for itself
Towers win because they sit where enemies have to walk. A hero wins because you can put it there too — but only if you understand which spot that is. For almost every hero, it is the rally point: the stretch of path where your barracks block already slows the wave down and your artillery already has splash coverage.
At a rally point, three things multiply. Your hero's damage lands on enemies that are not moving fast. Artillery shells cover the same tile. Barracks troops are holding the same enemies. One well-timed ability at a rally point does the work of three.
Now consider the exit. Parking a hero next to the castle gate feels safe and is the most common mistake in the game. At the exit, your hero is fighting enemies that have already walked through your entire defense. There is nothing behind them to shoot, no splash to double up on, and the enemies are at their most dangerous. A hero there is just a health bar that will run out.
A few positioning patterns that work:
- Behind the block. Stand the hero a short distance behind your barracks so it is hit only after the wave has been slowed.
- On the straight. Long straight runs are where stuns, slows and splash pay off best. Put the hero here, not on a curve.
- With the towers. King Denas and any ranged hero want to be inside your tower coverage, not ahead of it.
- Never alone. A hero standing out in open path with no towers behind it is the first thing that dies.
Do not
Do not park a hero at the exit "to plug the last gap". Plug gaps with tower range, barracks bodies, and Reinforcements. The hero's job is to make an already strong position overwhelming.
Ability timing: hold both buttons for the right wave
Every hero has two abilities and both refill over the course of a stage. New players press them on the first wave to see what happens. That is how they arrive at stage 20 with nothing left for the boss.
The rule is simple: identify the wave before it arrives, and save both abilities for it. Look at the wave preview before you call the wave. Bosses are usually obvious. Elite packs usually come attached to a boss wave or the wave right after a boss, and they are where the real threat is.
- Hold the ultimate for the boss or the elite pack, not for the trash that precedes it.
- Fire both into the same target when the ability is single-target. Two abilities on one boss beat one ability on a crowd.
- Use the control ability early in the wave. A stun on the front pack buys seconds for the rest of the wave to walk into your kill zone.
- Do not spend both early "just in case." There is always another wave.
Timing drill
Before calling any wave, ask yourself one question: which single wave on this level is most likely to cost me lives if I mishandle it? That is your hero wave. Everything else gets incidental damage only.
When not to bring a hero, and how a hero loses you lives
Some stages are won entirely by towers. If the wave structure is fully covered by four well-placed towers and the level gives you no room to reposition, a hero is just one more thing that can go wrong. There is no rule that says you must deploy one.
More importantly, heroes are not purely additive. A hero can make a stage worse in three specific ways.
Blocking the wrong unit
Barracks block the wave that matters. If your hero steps into the path and body-blocks a runner or an imp instead, you have taken your blocking slot away from the tanky front rank and handed the fast unit free passage. Blocking is a tool, not a default. Only block when stopping that specific unit buys you something.
Pulling aggro out of your kill zone
A hero standing far ahead of your defense pulls enemy attention toward itself. That sounds like it helps — it means your towers are shooting the tank instead of letting it tank. But it also means the hero is drawing the wave away from your artillery splash and toward a corner with no coverage. If the hero dies there, you have lost your aggro sponge and moved the fight to the worst tile on the map.
Standing on the wrong damage type
A hero with magic abilities does not help a physical-only defense, and a heavy armored wave will walk straight through a hero whose abilities are all single-target physical. If your damage type does not match the wave, deploying the hero is worse than not deploying it, because it encourages you to leave that tile uncovered.
Warning
If your hero is dying in the same place twice, stop moving it and stop pressing buttons. Pull it back behind the block, let it reforge, and give it a job your towers are not already doing.
Starter hero picks
If you have unlocked exactly one or two heroes, these are the ones that carry the base campaign. You cannot go wrong with any of them.
Sir Gerald
The balanced pick. Strengthens your block, soaks a pack, and has no bad stage. If you only buy one hero, buy this one.
Ignus
Magic damage plus spreading burn. Slots in next to a mage spine on heavy-armor stages where chips never finish the job.
Malik Hammerfury
Stun and block. Doubles the value of any long straight covered by artillery. Nothing else slows a wave that hard.
Magnus Spellbane
Pure magic burst. Bring him when a single elite unit has more health than your towers can chew through in a wave.
Quick reference: all nine heroes
Print this. It is the whole roster on one screen.
| Hero | Class | Primary value | Best stage type |
|---|---|---|---|
| Sir Gerald | Knight — melee | Buffs nearby allies and soaks a pack | Any stage; the safe default |
| Alleria Swiftwind | Ranger — summons | Adds a mobile front line of wildcats | Stages needing extra bodies on the block |
| Malik Hammerfury | Dwarf — control | Stuns and blocks to buy seconds | Long straights covered by artillery |
| Bolin Farslayer | Archer — ranged physical | Precise single-target bursts | Archer-heavy builds, fast trash |
| Elora Wintersong | Healer — support | Restores heroes and barracks along the path | Long, attritional stages |
| King Denas | King — passive aura | Strengthens towers near his position | Stages where towers are almost enough |
| Ignus | Fire mage — ranged magic | Burning damage that spreads in packs | Armored, tightly packed waves |
| Magnus Spellbane | Sorcerer — burst magic | Heavy single-target spell damage | Boss fights and elite units |
| Ingvar Bearclaw | Viking — melee | Sustained melee pressure inside a block | Stages with an artillery kill zone |
Note the damage type column. Four of the nine heroes deal magic damage and one deals physical ranged damage, which means the heroes are not interchangeable — a stage built around magic-resistant enemies wants a different hero than a stage built around armor.