
The resistance system
Every enemy in Kingdom Rush has two independent damage-reduction stats: physical armor and magic resistance. They reduce different damage types, they stack differently, and picking the wrong tower against them is the single biggest reason players stall on a stage.
The rule that does most of the work is short:
- Magic damage ignores physical armor. Mage towers hit armored enemies at full value. That is why a mage is the standard answer to anything heavy.
- Physical damage is cut by physical armor, and physical attacks are themselves reduced by magic resistance. A heavily armored enemy is only genuinely tough if it also resists magic.
So the four base towers split cleanly. Archers and artillery deal physical damage. Mages deal magic damage. A mage is the answer to armor. Archers and artillery are the answer to magic resistance. You do not need to out-level an enemy; you need to hit it with the type it is weak to.

What "high armor, low magic resist" means for you
This is the most common combination in the game and the easiest to solve. An enemy with high armor and no meaningful magic resistance looks terrifying in the wave preview and dies to a single mage line. Archer towers hitting it are throwing away most of their output.
Practical response: bring a mage early, upgrade the mage, and stop spending gold on archers you were only building out of habit. If your damage is all physical and the wave is armored, you are not under-leveled, you are mis-typed. Adding a third archer tower does not fix it. Adding a mage does.
The mirror case is a magic-resistant enemy — something with low armor but strong resistance to magic. Against that, your mages are the problem. Archer towers and artillery physical output bypass that resistance entirely, which is exactly why artillery is the strongest answer to a magic-resistant boss.
The one-line rule
Armor means build mages. Magic resistance means build archers and artillery. When you are unsure which you are looking at, build one of each and let the wave tell you.
The game has more than 45 enemy types in the original release, and the in-game encyclopedia logs each one as you meet it. If you want to know what you are actually facing, open it during a stage and read the entry rather than guessing from the sprite.
Enemy roles
Enemies are not just stat blocks. Each one has a job in the wave, and the job tells you what you need to build. Learn to name the role and you stop reacting to health bars and start reacting to intent.
- Trash and mobs. Weak, numerous, mixed with everything else. Their job is to consume your attention and your tower cooldowns. Artillery handles them best because it never wastes a shot.
- Fast units. High movement, low health, usually grouped. They punish a defense that only has slow long-range coverage.
- Armored units. High physical armor, usually slow, usually front rank. They are the mage's reason to exist.
- Shielded units. Protected by a separate shield layer that takes damage before the body. Chip damage into a shield is wasted work.
- Regenerating units. They heal continuously. If your total damage per second is lower than their regeneration rate, they simply do not die.
- Flying units. They ignore the ground path entirely and beeline toward your towers and your exit.
- Ranged units. They attack from a distance, which means they can damage your heroes and your buildings without being blocked.
- Bosses. Very high health, often with resistances, adds, and phases that change their behavior mid-fight.
- Support and summoners. They do almost no damage themselves. They heal, raise, or spawn other enemies.
Most waves are a mix. The mistake is treating the wave as one problem when it is three: a slow armored front rank, a fast group behind it, and a healer off to the side. You cannot solve that with one tower type.
Flying enemies
Flying units bypass the path and cut straight across the map. They are not blocked by barracks, they are not slowed by anything on the ground, and most towers simply cannot touch them.
Only Archer-class towers reliably hit air. Archers are the one tower line you must build before you know flyers are coming, because a flyer that reaches your towers takes them offline and you cannot answer it afterward. The Sasquatch is the other reliable anti-air option — a large slow unit with a ground-shattering attack that reaches fliers.
This is why the archer line matters more than its damage suggests. An archer tower is not just a physical damage dealer. It is your entire air defense, and its upgrade path is insurance rather than investment. A stage with flyers in the last third will kill a player who spent everything on mages and artillery, no matter how good those towers are.

Reinforcements and the air problem
Reinforcements are the standing emergency button — a squad of your own soldiers that walks in from the side and fights whatever is nearest. They are the fastest way to plug a hole mid-wave, and on the Flash build of the game they target ground units only.
The Spear Throw Reinforcements upgrade changes that. Upgrading your barracks to spear throw lets the reinforcement squad hit flying units as well, which turns Reinforcements from a ground-only panic button into a real anti-air answer. If a stage mixes heavy air pressure with a tight budget, that upgrade is often more valuable than a third archer tower.
Air warning
Reinforcements without the spear throw upgrade cannot touch fliers at all. If air is coming and your barracks are still throwing swords, calling reinforcements will not save you.
One more detail about air: flyers target towers, not the path. That means your tower placement matters more, not less. Spread your key towers out so one flyer cannot remove a quarter of your defense in a single pass, and keep the archer towers in range of the straight line the flyers will take rather than the line the ground enemies walk.
Shielded and regenerating enemies
These two roles break the assumption that damage is cumulative. Both of them mean your damage has to be concentrated and of the right type, and neither is fixed by adding more towers.
Shields
A shield sits in front of the enemy's health and absorbs damage before the body takes any. While the shield is up, damage aimed at the unit itself is largely wasted. You have to break the shield first, then kill the unit — two separate damage requirements in the same time window.
The counter tools are specific. The Sorcerer Mage's polymorph ability and armor-stripping effects remove protection outright rather than grinding through it. The Arcane Shatter upgrade on the Mage line exists for the same reason: it makes magic damage hit harder and more efficiently, which is the fastest route through a shielded front rank.
The general principle: do not answer a shield with a single tower firing slowly. Answer it with a burst that removes the shield in one window, then keep the pressure on while your damage lands on the body.

Regeneration
A regenerating enemy heals continuously while it lives. This inverts the normal math: instead of asking "is my total damage enough", you have to ask "is my damage per second higher than their healing per second". If it is not, no amount of time saves you — the enemy reaches your exit at full health.
Against regeneration you want burst, not persistence. Artillery, a mage ultimate, or a hero ability that lands a large amount of damage in a short window will finish them. Slow, steady single-target fire will not. This is also why regeneration forces a damage-type decision: if your burst is magic and the enemy resists magic, you have no answer even with a huge amount of it.
Read the wave
If a wave is not dying, check whether the enemies are shielded, regenerating, or simply out of your damage type. Each has a different fix and the wrong fix costs you the whole stage.
Summoners and support units
Support units do almost no damage. They are not there to kill you. They are there to make the rest of the wave impossible to kill, and that makes them the highest-priority target on the field.
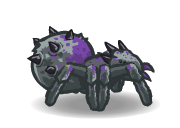
You will meet shamans that heal nearby allies, cultists that buff the enemies around them, spider queens that keep producing new small units, and necromancer-type units that put fallen enemies back on the path. The behaviors differ. The lesson does not.
Killing the support unit early is almost always worth more than finishing the tank. A tanky armored front rank soaking your mage damage is a solved problem — you know the answer, you build the right tower, it takes longer. A healer behind it means the problem you solved never ends. So when a wave stalls, look past the biggest enemy and find the one doing nothing visible.

How to actually get the shot:
- Build splash on the back rank. Artillery and mage area damage reach support units without you having to target them individually.
- Use a fast hero. A ranged hero with a long-range ability can reach the support unit before your towers have ground the front rank down.
- Stop reinforcing the tank. If your mage line is chewing on a unit that is being healed, you are losing a race you cannot win. Redirect that damage.
- Do not ignore the summons. If the wave keeps producing new units, killing the summoner matters more than killing anything it produced.
Priority rule
When a wave stalls and you cannot explain why, the answer is almost always a support unit. Stop aiming at the biggest health bar on screen and find the one that is not taking damage.
Fast swarm enemies
Runners, hounds, imps, harpies and bats share one design: fast movement, low health, and a grouping pattern that makes them arrive as a cluster. Individually they are nothing. Together they overwhelm any defense built on slow, single-target fire.
The instinctive response — build more damage and out-kill them — is usually wrong. Fast units spend a short time in range and then leave. They cross your tower coverage so quickly that most of your total damage never lands, and the wave arrives at the exit having taken a fraction of the hits you paid for.
Body-blocking beats out-damaging them. A barracks troop standing in the path does three things at once: it stops movement, it makes every other tower's shots hit reliably, and it forces the swarm to fight on ground you chose. Slow the swarm down first and your existing damage becomes enough. Without the slow, you are firing at a moving target and paying full price for it.
A stun from Malik is the same idea in hero form — freeze the pack inside your kill zone so the whole group takes every shot you have. Malik and barracks solve the same problem at two different scales, which is why they stack so well.
Against swarms
Block first, shoot second. Anything that slows or stops the group turns a defense that cannot win the damage race into one that barely needs to.
Harpy-type flyers are the exception to the blocking advice, since nothing on the ground can stop them. Those waves are an air problem and they get solved with archer coverage and spear throw reinforcements, not with more barracks.
Bosses and elites
A boss fight has a shape, and once you recognize the shape you can prepare for it instead of reacting to it.
Every boss in Kingdom Rush shares a broad profile: very high health compared to anything else in the game, resistances that decide which of your towers is even allowed to participate, and a tendency to bring friends. The base campaign runs through the Juggernaut, the Troll Warlord, and a final wizard. Later free content adds more, including Moloch the Archdevil and a Lord Blackburn undead campaign.
- Resistances first. Decide your damage type before you build. A boss with heavy armor is a mage fight. A boss with magic resistance is an archer and artillery fight. Building the wrong line is the single biggest cause of boss attempts that fail no matter how many lives you spend.
- Damage type consistency. Half your towers hitting for nothing is worse than all your towers hitting for less. Commit to one type for the boss and use the rest of your build for the adds.
- Burst windows. Bosses have moments when they stop, charge, or change behavior. Damage during those windows is worth several times the same damage during movement.
- The adds come with it. Most boss waves send support units, ranged units, or swarms alongside the boss. Your hero is often best spent on those, not on the boss itself.
- Reinforce at the right moment. Reinforcements with spear throw are the correct answer to an add pack. Calling them onto the boss body wastes the ability.
Elites follow the same logic at a smaller scale. An elite pack is a boss wave without the drama: one or two units with enough health and resistances to stall your defense, arriving with an escort. Treat it as a boss and prepare for it as one.
Boss prep
Decide the damage type, clear the add sources, and hold a hero ability for the window. Bosses lose to preparation more often than they lose to gold.
Cheat sheet: enemy behavior to response
This is the page to come back to. Find the behavior in the left column, apply the response on the right.
| Enemy behavior | What it means | Correct response |
|---|---|---|
| High armor, low magic resist | Physical physical hits are wasted | Mage line, upgraded early. Stop adding archers. |
| Low armor, high magic resist | Mage magic hits are wasted | Archers and artillery physical. Barracks to hold the front. |
| Flying | Path bypassed, nothing on the ground reaches it | Archer towers covering the straight line, or Sasquatch. Spear throw Reinforcements. |
| Fast swarm | Outruns slow, single-target fire | Barracks body block. Stun them inside your splash. Do not race them on damage. |
| Shielded | Damage goes into the shield first | Polymorph or armor stripping; Arcane Shatter. Then burst the body. |
| Regenerating | Heals outpace chip damage | High burst per second — artillery or a mage ultimate. Persistence loses. |
| Support or summoner | Makes the rest of the wave unkillable | Kill it first. Splash on the back rank or a ranged hero reaching it. |
| Ranged attacker | Damages heroes and towers from outside the block | Barracks or a blocking hero to engage it. Stop it before it reaches range. |
| Boss with armor | Tank with heavy physical reduction | Mages plus hero burst. Hold the ultimate for the window. |
| Boss with magic resist | Tank that shrugs off mages | Archers and artillery. Reinforcements on the adds, not the boss. |
A second table for the damage types themselves, since this is the decision underneath everything else:
| Tower | Damage type | Ignores | Best against |
|---|---|---|---|
| Mage | Magic | Physical armor | Armored units, shielded front ranks with Arcane Shatter |
| Archer | physical | Magic resistance | Flying units above all; magic-resistant trash |
| Artillery | physical | Magic resistance, single targets | Packs, swarms, regenerating units, back-rank support |
| Barracks | Blocking | Nothing — it does not need to hit anything | Fast swarms, anything that must be slowed for splash to land |
One last note that saves stages you thought you had lost. In the Flash build of Kingdom Rush, Rain of Fire can be aimed anywhere on the level, not just on the path. That turns artillery into an anti-air and anti-ranged unit tool on maps where a flyer is walking straight past your whole defense. The mobile and Steam releases restrict it to the path, so guides written for those versions will tell you it cannot hit air. On the version on this site, it can.
Quick answers
What beats armored enemies in Kingdom Rush?
Which towers can hit flying enemies?
How do I deal with a wave that will not die?
Should I focus the healer or the tank?
What actually walks the road
The original game has more than 45 enemy types, and the in-game encyclopedia lists every one of them. You will never memorise them all, and you do not need to. What you need is a handful of silhouettes you recognise instantly, because a silhouette tells you the role before the wave preview does.
These are the shapes worth internalising, taken from the game's own artwork:


How to use this
When a wave preview shows a shape you recognise, you already know the answer. A horned brute means mage. A wyvern means archer. A dwarf means burst, not grind. Everything else — exact resistances, exact health — you can look up in the encyclopedia mid-stage, once you know what you are looking at.