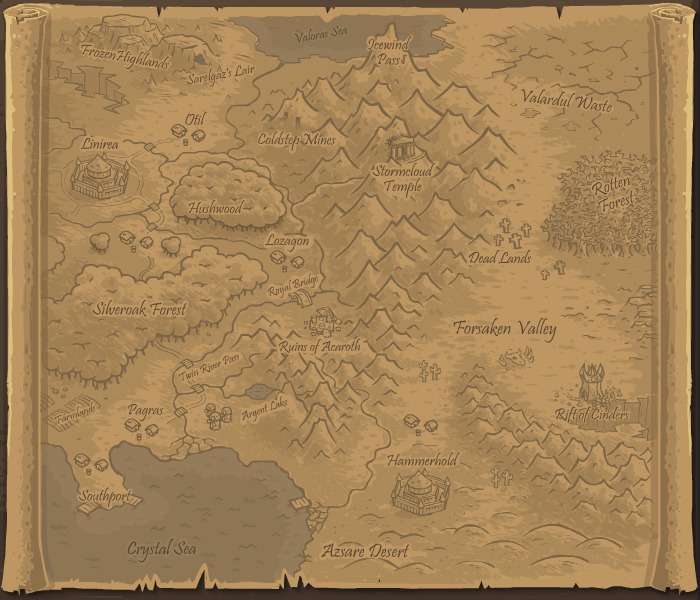
How the campaign is structured
Twelve stages, played in order, spread across a world map. Each stage is a briefing, a build, and a score you can improve later. Nothing about that structure is complex. What makes the campaign interesting is that it teaches you its own lesson in a fixed order, and the order is deliberate.
You start at the coast with a small town, a tight road, and a handful of bandits. You end at the Dark Tower, which is not a road at all in the tactical sense — it is a corridor you have to hold with a full roster and a hero at the right level. Between those two points, the campaign systematically introduces every system the game has: the four towers, multi-lane maps, support enemies that buff their neighbours, heavy armor that shrugs off arrows, flying units that ignore your ground towers entirely, and finally bosses with health pools that nothing you own can chew through at first contact.
Every stage arrives with a text briefing delivered before you start. Read it. It names the region, names the threat, and tells you what the enemy commander is trying to do. More importantly, briefing text is the only place the game tells you what is coming before you commit gold, and the campaign's difficulty curve is built so that the briefing for stage eight is meaningfully more alarming than the briefing for stage two.
Lives and stars
Every stage gives you 20 lives. The star rating is a straight read on how many you kept:
- 3 stars — finish with 18 to 20 lives remaining.
- 2 stars — finish with 6 to 17 lives remaining.
- 1 star — finish with 1 to 5 lives remaining.
Losing zero lives is possible and gives no bonus. Chasing a third star by shaving off a single stray runner is a bad use of your attention, because the moment you start playing for lives you stop playing for the map.
What a 3-star stage unlocks
Finishing a stage with all three stars unlocks two extra attempts on that same map: the Heroic Challenge and the Iron Challenge. Both are one-life runs. Both award a single star if you survive. That is the entire unlock rule — no hidden currency, no prerequisite stage. You can therefore unlock challenges in the core campaign in any order, including by replaying stage one.
Stage unlocks themselves are strictly linear through the core 12. There is no branching. This matters for planning: you cannot farm a later stage's stars to shortcut the earlier ones, and you cannot skip a map you dislike. You will play all twelve, in order, at least once.
Plan the run
On your first pass through a stage, play to learn the map rather than to score. Let a few lives go. You get the star back on a replay in under two minutes once you know where the map breaks, and you cannot replay a map you never understood in the first place.
How to run the whole campaign efficiently
Twelve stages done badly takes three hours. Twelve stages done deliberately takes under two, and leaves you with the banked stars and hero levels you need for the challenges and the free content afterward.
First pass: find the break point, not the perfect score
On your first attempt at a stage, your only job is to locate the spot where the map fails. That is almost always one of three things: a lane you left undefended, a tower type that cannot answer the wave that shows up in the second half, or a chokepoint you identified too late to exploit. You will not find that spot while trying to hold all 20 lives. You will find it on the wave where you first lose lives badly, and it will usually be obvious once you see it.
So play the first attempt fast. Build a reasonable spread of towers, sell and rebuy freely, and when the run falls apart, note which lane and which wave did it. Most players can identify the failure in the moment and still cannot articulate it afterward. Write it down.
Second pass: convert the knowledge into stars
Now replay with the answer in hand. This is where the third star comes from, and it comes fast because the map is no longer a mystery. Keep the same tower placements that worked, drop the ones that did nothing, and re-order your upgrade spending so the strongest damage type reaches its final tier first.
Where to farm stars
Stars are the campaign's currency for everything permanent, so it pays to know which stages are cheap star sources. In general:
- Early single-lane stages are the cheapest three-star farm in the game. Short maps, small gold pools, forgiving timing. If you need stars to unlock a hero or a global upgrade, start here.
- Mid-campaign multi-lane stages are worth a replay but not worth grinding. You will hit three stars on the second or third attempt and then move on.
- Boss stages are the worst star source relative to effort. They take longer, they punish experimentation, and you will replay them more for practice than for score.
- The free-content stages are better star sources than anything in the core run, once you have them, because they are short and they are not gating your progress.
| Segment | Build that works | Common mistake |
|---|---|---|
| Coastal opening | Archers plus one mage; sell the barracks if you want it back | Buying four tower types on turn one with no gold left for upgrades |
| Farmlands and Pagras | Barracks on the long lane, archers on the short one | Ignoring support enemies and letting them buff the whole wave |
| Mountains and Twin Rivers | Mages as the primary damage, artillery as support | Relying on arrows against armored enemies |
| Silveroak Forest | Archers first, everywhere, then mages behind them | No anti-air anywhere on the map |
| Capital and the Juggernaut | Magic damage plus a level-4 tower, hero blocking | Bringing a physical-only board to an armor boss |
| Wasteland run | Two full lines, artillery at the shared chokepoint | Trying to cover every entry lane with one defense |
| Dark Tower finale | Everything, level-4, hero parked at the last corner | Spending ultimates on the summons instead of the boss |
When to change difficulty
The campaign has a harder mode, added after the original launch alongside the Winter Storm content. Treat it as a separate campaign rather than a modifier. The stage list is the same, but the pressure is different enough that your old placement habits are not transferable. Do not attempt it until you have finished the core run and cleared at least one challenge mode, because its wave timing punishes the kind of slow, greedy early build that still works on normal.
Hero levels as the real progression
Your hero gains a skill point per stage you complete, and those points are permanent for that hero. This is the most underused progression in the game. A hero left at base level through the campaign is dramatically weaker than the same hero levelled on every stage, and hero damage is often the difference between a wave that leaks and a wave that does not. Level every hero you own, on every stage, on every replay — the cost is a click.
Do not skip heroes
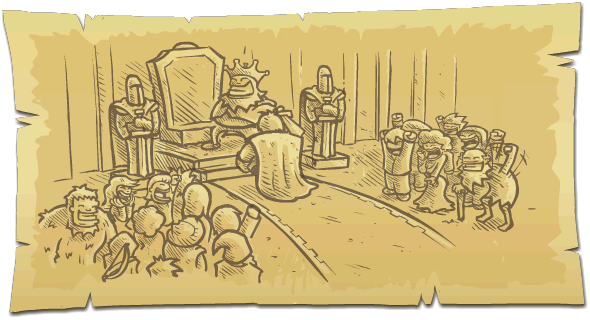
Hero availability differs by edition, so check the roster in your build before planning around a particular character. Campaign stars are valuable for permanent tower and spell upgrades; spend them on tools that address the stages currently stopping your progress.
Stage-by-stage strategy, by difficulty tier
Rather than a per-level enemy table — which would be guesswork dressed up as data — this section groups the 12 stages into seven segments that share a difficulty profile and a correct answer. Learn the pattern once and the stages inside it stop being twelve problems.
The opening stages: coastal town and first bandits
What it punishes: spending. Early gold is tight and the maps are short, so a four-tower spread with no upgrades loses to three well-placed towers with a damage spike. These maps also punish you for putting a tower where nothing walks — there is so little path that a misplaced tower is dead weight for the entire stage.
Build that works: archers as your default because they are cheap and cover a lot of ground for the money, one mage placed where the road straightens out, and nothing else until you have seen what the later waves do. If you find yourself with barracks gold you cannot use, sell it. A barracks with no upgrades is a unit generator that cannot kill anything; the archers are doing the work anyway.
Common mistake: upgrading for the sake of upgrading. Buy the first tier on your main damage tower immediately after placing it, and hold the rest. Early upgrade levels are worth far more per coin than late ones, and the game charges roughly the same for both.
Hero points: put them in your active skill. On these maps your hero is not about damage — it is about the slow, the stun, or the knockback that buys your towers a few extra seconds. That effect scales with investment in a way basic damage does not.
The farmland and Pagras push
What it punishes: single-lane thinking. These are the first genuinely multi-lane maps, and they punish you for having assumed there is one place worth defending. They also introduce support enemies — shamans and their equivalents — who buff nearby allies. Kill the support and the wave falls apart; ignore it and the wave gets stronger as it walks.
Build that works: this is where the barracks earns its keep. Long lanes feed body-blockers, and a barracks unit standing in the road absorbs the wave while your damage towers work. Put the barracks on the lane that is longest, not the lane that is most dangerous — duration is what matters. Cover the second lane with archers and a mage.
Common mistake: building one full line and trying to extend it to a second lane later. Gold spent on a third tower nobody upgrades is worse than gold spent deepening one strong position.
Hero points: split between the active skill and whatever passive keeps your hero alive. On multi-lane maps a hero who dies on the far lane because you were watching the near one stops contributing for most of the stage.
Reading the stage before you build
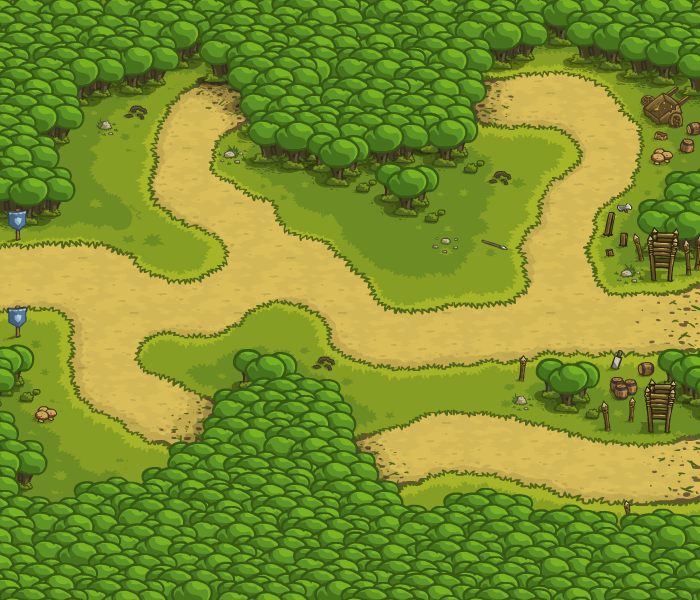
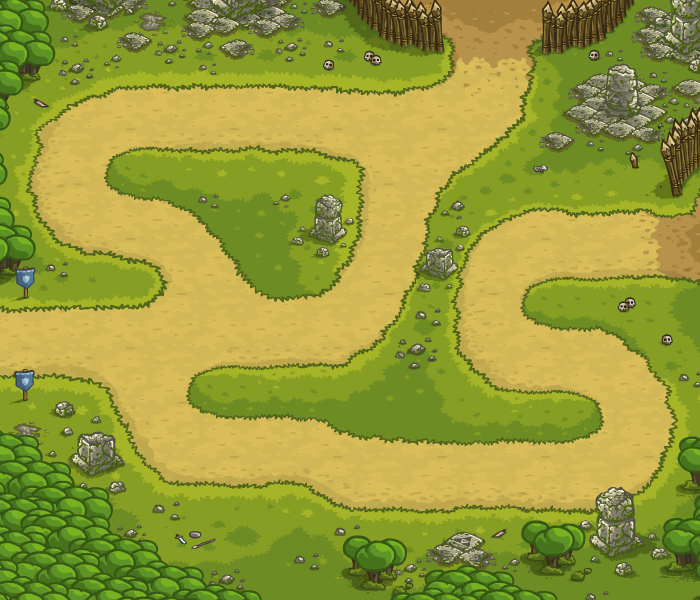
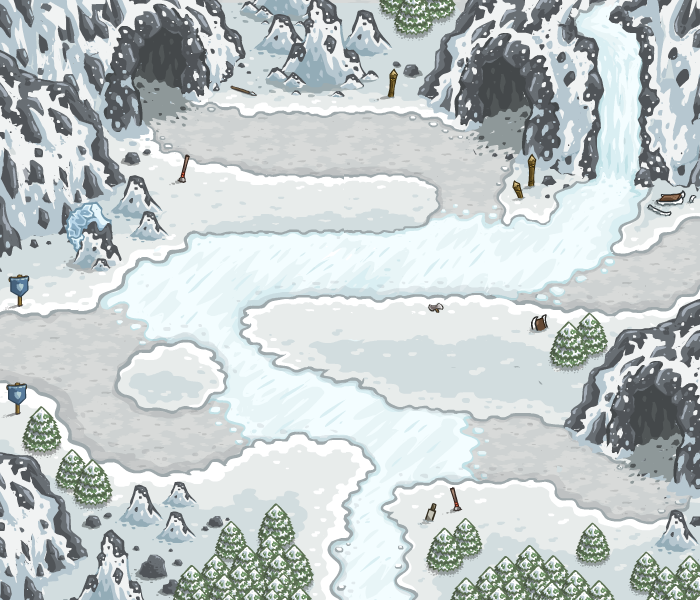
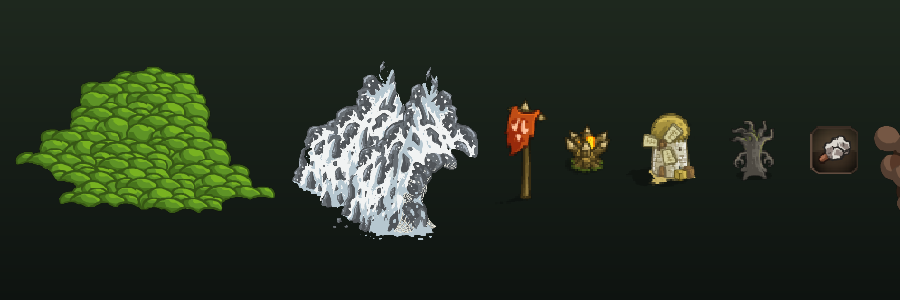
Before you place a single tower, look at what the map is actually made of. Kingdom Rush stages are not empty fields — they are built from a small vocabulary of props, and each one tells you something about how the fight will happen. A bush and a rock face are cover and boundaries. A banner marks a faction's territory. A campfire, a gravestone and a dead tree mark ground that has already been fought over. An anvil is what a settlement looks like when the blacksmithing has stopped.




The habit worth building
Count the buildable tiles before you count the road. A map with six build spots and a hairpin is a different problem from a map with six build spots and a straight run, even when the wave composition is identical. The props tell you where the map decided the fight would happen — put your towers there.
The mountain and Twin Rivers run
What it punishes: armor, and single-damage-type boards. Heavy armored enemies are the campaign's first real damage-type check. Arrows do badly against them. If your whole defense is physical, you will watch a wave walk through your best-positioned tower and reach the exit while your damage numbers look healthy in aggregate.
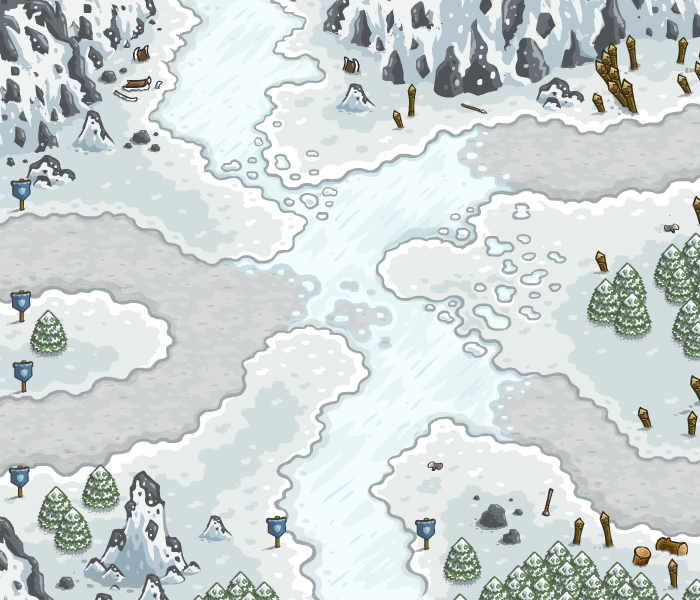
Build that works: magic damage as your primary output from here on. Mages ignore armor the way arrows ignore it, and a mage line paired with an artillery piece behind it covers both the single-target and the clustered cases. Sir Gerald joins the roster around this stretch of the campaign, which matters less for his damage and more for his ability to tank a whole lane alone.
Common mistake: keeping one archer tower "just in case" and feeding it gold that should have gone into the mage line. Against armor it is not a backup; it is a dead investment.
Hero points: magic damage or armor-piercing effects, depending on what your hero has. From here on, hero damage type is a build decision, not a formality.
Silveroak Forest and the elven reinforcement
What it punishes: ground-only defense. Flying enemies appear, and they ignore the road. Barracks body-blockers do nothing to them, artillery aimed along the path does nothing to them, and your beautiful ground line watches a flyer walk over the top of all of it. This is the single most common campaign blind spot, because it arrives late enough that players think they have a working system.
Build that works: the Archer Tower stops being optional at this segment. Every major line needs at least one archer tower with a clear view of the airspace above it, and on long maps you want two. Place them where the flyers will walk — over the chokepoint, not tucked behind your artillery. Then keep your ground damage as the answer to everything else.
Common mistake: buying a single archer tower as a token anti-air measure and then spreading everything else on the assumption that flyers are handled. One archer tower with no upgrades cannot clear a flying wave. Upgrade the archer; do not just place it.
Hero points: if your hero has any ability that reaches air, that ability becomes far more valuable than raw damage. A hero who can reliably damage flyers is worth several tower levels on this segment.
Anti-air rule of thumb
When you cannot remember whether a stage has flyers, build the archer line first and let the rest of your gold follow. A mage-heavy board with one upgraded archer tower behind it clears both ground and air. The reverse — a physical board with one mage — does not.
The capital and the Juggernaut
What it punishes: this is the campaign's first boss, and it punishes a board built entirely out of one damage type. The Juggernaut carries heavy armor. Arrow damage against it is close to a waste of tower slots, and the correct answer is magic damage, or true damage, or a hero whose damage ignores armor.
Build that works: take at least one tower to level 4 before this fight. A level-4 tower is not a modest upgrade over level 3 — it is a different amount of damage, and bosses are precisely the situation where that difference decides the run. Pair it with artillery splash so the adds that spawn alongside the boss die before they become a second problem, and let your hero body-block at the last corner so the boss is forced to walk through the entire kill zone.
Common mistake: arriving with a strong level-3 board and no level-4 tower anywhere, because the level-4 upgrades cost coins you wanted for a fifth tower. On boss stages that trade loses every time.
Hero points: max the active skill and any survivability. Heroic and Iron Challenge for this stage require the same board, so the points you buy here are reused immediately.
The wasteland run toward Vez'nan
What it punishes: trying to cover everything with one defense. The wasteland stretch is the hardest continuous non-boss section of the campaign, and it punishes you for splitting your gold into thin positions across several entry lanes. Each lane has waves that individually feel manageable, and together they overrun a defense that was built lane by lane without a shared chokepoint.
Build that works: two full lines at the two longest lanes, plus artillery placed where the lanes converge or where the enemy groups bunch. Do not try to cover the third lane with a third full line. Let it be partially defended and let your hero plug the gap — a hero holding a leaky lane is a better use of attention than a third half-built tower.
Common mistake: defending in depth on every lane. Depth is valuable at a chokepoint and expensive everywhere else. Concentrate, then let your hero handle the rest.
Hero points: survivability and regeneration matter more here than anywhere before the finale. Your hero will be the thing standing in the lane that is one tower short, and a hero that dies does not come back within the wave.
The Dark Tower finale
What it punishes: the last stage is not about a single health pool. It is about a boss with a health pool plus a stream of summons plus a map that gives you a lot of ground to lose. Players who arrive with one giant damage tower and nothing else spend the fight with their hero dead and their summons unhandled.
Build that works: everything, at level 4, spread so that at least three separate things are killing the boss at once. Park the hero at the last corner and use the hero not for damage but as a wall — the point is to make Vez'nan walk the full length of your kill zone while your summons die in an area your artillery already covers.

Common mistake: spending your ultimate abilities on the summons. The summons are the distraction; the health pool is the objective. Hero ultimates and tower cooldowns go into the boss.
Hero points: invest everything. This is the fight where a leveled hero is the difference between a win and a coin loss, and it is the fight where you will replay most.
The upgrade trap
Do not spend early gold across all four tower types. In this campaign, depth beats breadth from the farmland segment onward — one fully upgraded damage tower plus one supporting tower beats three half-upgraded ones, on every map in the second half.
Stars, gems, and what to do with them after each stage
Stars are the only permanent currency in the core game. Spend them as soon as you have them, because every upgrade you buy is one fewer coin you have to earn on the next stage.
What stars buy
- Global tower upgrades. These apply to every tower you own on every stage, including ones you have not placed yet. This is the best value in the game. Buy these before anything else.
- Heroes. Check the in-game hero menu for the roster and unlock conditions in your edition.
- Retaining heroes between stages. If you do not keep a hero between stages, it leaves and you cannot bring it back. Keeping it costs nothing beyond having it on the field, so do it by default.
- Paladin and Darklord unlocks. Both of these live behind challenge clears rather than stars.
What gems are for
Gems are the currency behind the tower upgrade trees. They are not directly bought with stars — they are earned by clearing stages and spendable only inside the game's upgrade screen. The practical rule: buy cheap upgrades first, because their cost per effect falls off, and do not sink gems into a branch you are not using. An unused upgrade tree is wasted investment, not saved value.
Resets are free
Stars spent on global upgrades can be reset at any time, with no penalty. That makes experimentation cheap. If you have been dumping stars into one branch and then find out you prefer a different play style, reset and rebuild rather than forcing a build you do not enjoy. Very few decisions in Kingdom Rush are permanent, and the ones that look permanent usually are not.
Spend order
Global tower upgrades, then heroes, then the upgrade trees you are actually using. In that order, almost every early campaign stage becomes noticeably easier than it was the first time you played it.
Heroic Challenge and Iron Challenge
Both challenge modes unlock the moment you three-star a stage. Both are single-life runs. Both award one star. That is the whole mechanic, and it is enough to make them the sharpest difficulty in the game.
Heroic Challenge
Heroic removes the lives cushion without changing the map. The wave composition is the same, the path is the same, and you will fail in the same place you failed on normal — except now there is no second wave to recover from. Heroic is therefore a test of whether you actually fixed the problem, not whether you got lucky on the second half.
Approach it with a clean board rather than your normal-stage board. Many players keep a habitually greedy early build that survives on 20 lives. That build does not survive one life, and the failure will look sudden and inexplicable when it happens.
Iron Challenge
Iron changes the stage itself — a harder version of the map with different pressure and different pacing. It is not the same fight as Heroic; there is no shortcut from one to the other. Treat it as a separate puzzle, and expect to fail it several times on the first attempt.
Why you should not attempt them on a weak stage
The unlock condition is a 3-star, and the unlock condition is the only gate — nothing stops you from immediately trying a challenge on a stage you just scraped through. Do not. Challenge modes give you one life and take real time, and failures on them cost you the same attention as failures anywhere else. Clear the stage twice more first, with margin, and only then attempt the challenge. If you are finishing with 12 to 14 lives, you are not ready; you want to be finishing with 18 and then tightening to 20 before you try.
Prerequisite
Three-star the stage, then replay it until a normal win feels automatic. Only then take on Heroic, and only after that Iron. The challenge modes are a reward for mastery, not the next step after clearing.
Clearing challenge modes on the campaign is also how you unlock the Paladin and Darklord heroes. Those two are late-game answers to specific problems — heavy armor and heavy regeneration respectively — and having them changes which builds are worth learning. Do not plan your whole strategy around them before you have them.
Optional and unlockable content
The 12 core stages are the campaign. Almost everything else in the game is content layered on top of it, added across several post-launch updates. Here is what exists and what it adds, so you know what you are playing and what you are skipping.
The two-stage mini campaigns
Winter Storm is a two-stage mini campaign built around the troll warlord Ulguk-Hai. It shipped with a harder difficulty mode and new heroes, which makes it the update that most changed how the base game plays — the extra difficulty option in particular changes the whole skill curve. The Rise of the Bandits is the other two-stage mini campaign, a prequel-flavoured detour that adds more enemies and a different kind of pressure to a familiar map style. Both are short, both are worth clearing, and both give stars that feed the same permanent upgrade trees as the core campaign.
The Curse of Castle Blackburn
A four-stage undead campaign centered on Lord Blackburn, adding eight new enemy types. It was released as a Steam exclusive, so whether it appears in the browser build you are playing depends on the version. Its value is thematic variety rather than a new system — it reuses the same four towers against a roster built to punish the builds you already have. If you have ever wondered how your board holds up against enemies that do not fit the usual categories, this is where you find out.
Bonus stages
Beyond the campaigns, the game carries standalone bonus stages including the Ruins of Acaroth, the Rotten Forest, the Lair of Sarelgaz and the Fungal Forest. The Fungal Forest arrived as free content and brought a new hero plus its own boss, which makes it the most notable of the four. Bonus stages are short, self-contained, and generally better star sources than the core campaign — which is exactly why you should clear them for score rather than for the story.
What to clear first
If you want the shortest path to every hero in the game, clear the core 12 first — that is where most of the heroes and all of the base tower upgrades come from — then the Fungal Forest, then the mini campaigns, then Castle Blackburn if your version has it. Do it in that order and you will never be short of a damage type you need.
One more thing
This is an independent fan guide for Ironhide Game Studio's Kingdom Rush, published originally by Armor Games. Nothing here is official. If a piece of advice conflicts with what you see on your own screen, trust the screen — the exact wave composition is yours to observe, and it is the only reliable source.
Quick answers
The questions that come up most often about This page, answered directly.